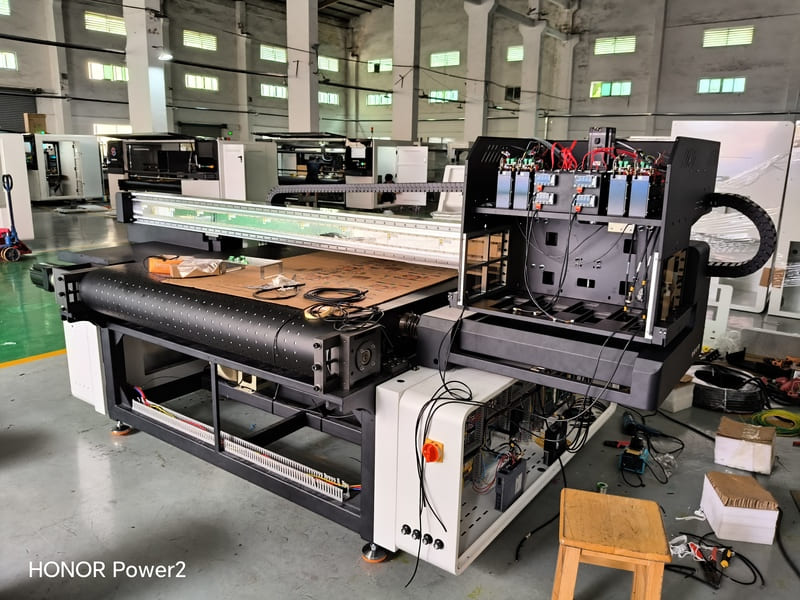
A digital printing machine is an industrial inkjet press that builds the graphic on a box one microscopic drop of ink at a time, directly onto the board, with no plate and no film anywhere in the process. Most explanations stop right there and move on to a feature list. This one does not. I want to walk you along the real ink path — from the moment a single nozzle fires, through the print bar, the ink system, the transport, and the curing stage, until a printed, slotted, stacked box rolls off the end of the line. That journey is where almost every quality argument on a packaging floor is actually settled.
I have spent 15+ years on the export side of packaging machinery, and I have stood next to enough presses at trade shows and inside customers' plants to know where the questions come from. Buyers almost always ask about DPI first, then print width, then speed. Very few ask what happens between the nozzle and the board — and that gap is exactly where disappointing samples come from. When a box plant tells me the digital samples looked "flat" or "washed out," nine times out of ten the cause sits somewhere along the ink path, not in the image file.
In one sentence: the ink path is the five physical stages a digital printing machine repeats on every sheet — drop formation, print bar layout, ink chemistry, transport and registration, and curing. Understand those five stages and you can predict how a press will behave long before you see it run.
Why the Ink Path Matters More Than the Spec Sheet
A spec sheet tells you what a machine can reach; the ink path tells you whether it reaches that number on your board, with your artwork, on a Tuesday afternoon when the humidity has climbed. Two presses can both advertise 1200 DPI and still produce very different boxes, because resolution is only one variable in a chain of five. If the drop lands a fraction of a millimetre late, if the white layer is not laid down evenly, or if the cure is incomplete, the final print degrades regardless of how many heads are bolted to the gantry.
This is also why our own engineering conversations rarely start with resolution. When a converter describes the job mix they want to move onto digital — short runs, many versions, brand colours that must match a litho reference — the first question is about substrate, and the second is about ink. Those two answers determine which printhead platform makes sense, how many heads the press needs, and how the whole line should be laid out.
Stage 1: How a Drop of Ink Leaves the Printhead
Everything begins inside the printhead, and the mechanism there decides what the rest of the machine can do. The platforms we build around fall into two families. The Epson Micro Piezo family uses a piezoelectric crystal that flexes when voltage is applied, pushing a measured volume of ink out of the nozzle — a mechanical action that gives very fine control over drop size, which is why this family is the natural choice for detailed graphics and 1200 DPI work on coated and kraft board. The industrial family, Xaar and Seiko heads, is built for durability and volume: heavier construction, larger drop ranges, and a service life measured in running hours rather than in print jobs.
The numbers behind those heads are worth knowing, because they translate directly into print quality. A Xaar head in our range carries either 1536 or 2560 active nozzles, with a native nozzle resolution of 360 npi arranged as 180 by 2 colour rows, a print width of 108.3 mm, and a jetting frequency up to 28 to 40 kHz. Drop volume spans 13 to 100 pl, 25 to 215 pl, or 9 to 30 pl depending on the model. Small drops give you fine detail; large drops give you solid coverage and the opacity that white ink needs on brown board. A press that cannot vary drop size is a press that will struggle with one job type or the other.
On the Epson side, a digital printing machine in our range can be configured with 8, 12, 16, 24, or 32 printheads at either 600 or 1200 DPI, and the same head platform supports five colours: cyan, magenta, yellow, black, and white. That flexibility matters more than it sounds. It means a converter can start with an eight-head machine for narrow board and grow into a 32-head configuration later without learning a new technology — the ink path is the same, only the scale changes.
Stage 2: The Print Bar — Where Head Count Sets Width and Speed
Heads do not work alone. They are mounted on a print bar, and the way that bar is arranged determines two of the three numbers every buyer asks about: width and speed. In a scanning, multi-pass arrangement, the bar travels across the board and lays down the image in several passes, building up resolution and colour density as it goes. In a single-pass arrangement, a fixed bar spans the full print width and the board passes underneath once, which is how these presses reach production speeds measured in metres per minute rather than metres per hour.
The practical spread across our platforms looks like this. An Epson-based scanning press with 8, 12, or 16 heads prints 264 mm, 400 mm, or 525 mm wide at throughputs of 700 to 1500 m/h depending on configuration. An Xaar-based industrial press with 6, 9, or 12 heads covers 200 mm, 300 mm, or 400 mm at 500, 800, or 1000 m/h. A Seiko-based press scales from 400 mm all the way to 1800 mm with throughputs of 70 to 110 m/min. Single-pass Epson configurations run 45 to 70 m/min at 400 or 525 mm, and the wide version pushes 795 mm or 1050 mm at 55 to 80 m/min.
What a spec sheet will not tell you is that head count and board size have to be matched, not maximised. Buy more width than your jobs need and you pay for it in ink, in maintenance, and in a bar that needs attention when the third head from the left clogs in the middle of a run. The right question is not "how wide can it print" but "how wide are the jobs I actually quote."
Stage 3: Ink Chemistry — Pigment, UV, and Why White Is the Hardest Channel
The third stage is where most quality complaints are born. Corrugated board is not paper — it is a sponge with a liner on top. Water-based pigment ink dropped onto an uncoated kraft liner will wick sideways along the fibres before it dries, softening edges and dulling colour. The fix is not more ink; it is the right ink and the right primer behaviour for that substrate, together with a drying stage that sets the pigment before it can travel.
White is the channel that exposes every weakness in a press. On brown kraft or on dark board, white has to be opaque enough to carry the colours printed over it, and it has to be laid down evenly across a wide bar. This is where a five-colour CMYKW system earns its place, and where drop volume stops being an abstract number. A head that can push a large, heavy drop produces the opacity white needs; a head tuned only for fine detail will leave white looking thin and grey. UV-curable inks take a different route again — the ink stays where it lands until a lamp or LED array sets it instantly, which is what makes them the natural pairing for water-resistant work and for lines where printed sheets need to move immediately into finishing.
Stage 4: Transport, Timing, and Registration
Here is the stage nobody photographs and everybody argues about. A digital printing machine fires drops in perfect rows only if the board arrives in perfect positions, and corrugated board is not a perfect material. Flute height varies between A, B, C, and E grades, honeycomb board behaves differently again, and board that has sat in a humid warehouse will not feed the same way it did when it was cut. Every one of those variations tries to shift the image relative to the sheet.
Registration is handled by an encoder that tracks board position and a controller that syncs image data to that position in real time. Because there is no plate to line up, digital presses avoid one classic source of drift — but they introduce another, and that one lives in the transport. This is why we pay so much attention to the feed section. The platforms we build are available with semi-automatic or fully automatic leading-edge feeding, and on a press that is meant to run continuously rather than in stop-start cycles, the automatic option is not a luxury. It is the difference between a machine that holds registration all shift and one that has to be re-trimmed after every interruption.
Stage 5: From Wet Ink to a Finished, Stacked Box
The last stage is the one that decides whether digital printing actually fits your plant or merely looks good in a sample room. On a UV press, the curing system sets the ink as the sheet leaves the print zone, so the board can go straight into slotting and stacking with no drying racks and no waiting. On a water-based press, the drying stage does the same job more gradually, and the design of that stage governs how fast the line can run before quality drops.
This is why we treat the press as one unit of a line rather than a standalone box. Our machines can be connected to a high-speed printing unit, a slotting unit, and an automatic stacking unit, so the printed box leaves the line slotted, counted, and ready for dispatch. The full range can also be connected to a plant ERP system, which sounds like a detail until you have watched a supervisor walk to the machine three times a shift to key in job numbers by hand. One-minute job changes matter most when they are supported by a workflow that never asks an operator to stop the line to re-enter data.
| Stage | What happens | Why it matters to you |
|---|---|---|
| 1. Drop formation | Nozzles in Epson, Xaar, or Seiko heads eject measured ink drops | Sets the detail ceiling and the opacity available for white |
| 2. Print bar | Scanning bar crosses the sheet, or a fixed bar prints in one pass | Decides print width and whether speed is measured in m/h or m/min |
| 3. Ink chemistry | Pigment or UV ink meets an absorbent or coated liner | Controls edge sharpness, colour depth, and fade resistance |
| 4. Transport | Encoder and controller sync drops to board position | Determines registration stability across flute grades and long shifts |
| 5. Curing | UV lamps set the ink instantly, or heated air dries water-based ink | Decides whether board moves straight into slotting and stacking |
What the Ink Path Explains About a Digital Printing Machine
Once you see the press as five stages rather than one black box, several buying arguments resolve themselves. A plant running mostly short promotional runs on E-flute with frequent design changes wants the fastest job changeover and the widest colour flexibility, which points toward a scanning press with a five-colour head set rather than the widest bar available. A plant moving high volumes of a handful of SKUs, where the graphic is fixed for weeks, gets more from a single-pass press and its metres-per-minute throughput, because changeover time almost disappears from the equation. A plant serving both patterns — the common case, in our experience — ends up looking at a two-in-one configuration that can switch between scanning quality and single-pass speed on the same platform.
The ink path also tells you what to inspect on a demonstration. Do not watch the machine print the sample the supplier brought. Bring your own artwork, on your own board, including the version with the large white area and the version with the fine barcode. Then look at the edges under a loupe, check the white for evenness, and ask to see the sheet go straight into the slotter without a drying pause. If a machine is asked to do the work it will actually do, the ink path will show you honestly what you are buying. If you want a closer look at how these platforms are configured across our ranges, the head families are set out in our printhead series overview, and the machine families are grouped under multi-pass platforms and single-pass platforms.
From Our Floor: Three Things the Ink Path Taught Us
The first lesson came from a converter in Southeast Asia who ran a batch of kraft boxes for a coffee brand and complained that the brown looked muddy. Nothing was wrong with the machine. The board had been stored in an open-air bay through a wet season, and its moisture content had risen enough to change how the ink wicked into the liner. We adjusted the drying profile and added a primer stage for that customer's stock, and the same artwork came out clean. The press had been fine; the substrate had changed.
The second lesson was about white. A packaging buyer wanted a solid white panel on a dark liner for a premium gift range, and the first proofs came back looking grey at the edges of the panel. The cause was drop size, not resolution — the configuration was tuned for fine detail and the white simply could not build enough opacity at that volume. Switching the white channel to a heavier drop profile fixed it in the same afternoon. That is why I say drop volume is not a spec-sheet detail; it is a design decision.
The third lesson was about registration and how unforgiving transport can be. A plant was running a mixed queue of B-flute and heavier double-wall board on one line and reported that images drifted on the thicker sheets. The feed section was set for the thinner grade. Once the automatic leading-edge feed was dialled in per grade and saved as a preset, drift disappeared. None of these three problems was solved by buying a different press. All three were solved by understanding which of the five stages was actually failing.
FAQ — Questions We Get About the Digital Printing Machine
Does a digital printing machine need plates or film?
No. The image travels from file to printhead as data, so there is no plate to engrave, mount, or store. Job changes are handled by loading a new file, which is why these presses are practical from a single box upward.
Which stage limits print quality the most?
In our experience it is the combination of ink chemistry and curing, not resolution. Corrugated board absorbs ink, so the way a drop is set on that liner decides edge sharpness and colour depth far more than a DPI number does.
Can one digital printing machine print fine text and heavy white panels?
Yes, if the head platform supports a wide drop range and the white channel can be tuned separately. A five-colour CMYKW configuration with adjustable drop volume handles both jobs on the same press without a substrate change.
How does flute grade affect registration?
A, B, C, E, and honeycomb board all feed differently because height and stiffness change. A press with an automatic leading-edge feed and per-grade presets holds registration better across a mixed queue than a fixed-feed machine.
What board sizes can a digital printing machine handle?
Across our ranges, print widths run from 200 mm on compact industrial configurations up to 1800 mm on the widest platforms, with common steps at 264, 400, 525, 795, and 1050 mm. Matching width to your actual job mix matters more than buying the maximum.
Final Word: Follow the Ink, Not the Brochure
A digital printing machine is often sold as a list of numbers, but it earns its keep as a chain of five physical stages that either work together or do not. When you evaluate a press, follow the ink: watch it leave the nozzle, cross the bar, meet your liner, hold its position through the transport, and set before the sheet reaches the slotter. A machine that handles all five stages on your own board, with your own artwork, is a machine you can plan production around. One that only shines on the supplier's demo sample is a question, not an answer.
If you would like to run that walkthrough on your own job mix, our technical team is glad to go through the ink path of a digital printing machine stage by stage, with your board samples in hand. No obligation, and no pressure to commit to a configuration before the samples are agreed.
See how the ink path shapes every digital printing machine series
Compare print widths, head counts, and throughputs across the scanning, single-pass, and two-in-one platforms.
Browse the Digital Press RangeHave a board and an artwork you want tested?
Send us the substrate grade and the file. We will tell you which stage of the ink path is likely to be the deciding factor for your job.
Request a Print Walkthrough